Magnetic Nord is the story about our homestead in Northern Minnesota on the shore of Lake Superior.

Tuesday, May 31, 2011

Insulation & Drywall

Now that the cabin is wired it is time to finish out the walls and start thinking of really making this place home.  Although I ended up really enjoying wiring I was eager to get back into projects that I am a little more familiar with.    

In northern Minnesota, a well insulated home is absolutely crucial to a comfortable winter.  The day we passed our rough in electrical inspection I hit the ground running and was able to get all of the exterior walls insulated. 


Before we could drywall the ceiling, I needed to build the storage platform in the rafters.  I first framed cross members atop the trusses to build the platform on.  From there we heaved sheets up and placed them down the center of the entire structure.  We now have almost 400 square feet of storage!

Notice the black pieces along the walls.  Those are plastic sheets that allow air to flow from the soffit vent up towards the vent that runs along the ridge.  They prevent the blown-in insulation from clogging the vents.
  
A plastic vapor barrier is then stapled tight on the ceiling and walls before the drywall is installed.  Once the vapor barrier is "tacked in", the first step in drywalling is to lift the ceiling panels.  These 5/8" thick sheets made of gypsum (a soft mineral) are 4x8 feet.  Needless to say they are quite heavy.  To lift them I enlisted the tallest, strongest friends that I have.  Without a mechanized panel lifter, the easiest way to hoist these sheets 8 feet in the air is to build two "T's" out of 2x4 lumber.  Two people each take a "T" and lift the sheet on either end while the third person fastens the drywall screws into the joist with a screw gun and counter sink bit.  The counter sink bit drives the screw into the sheet so that you can put a layer of mud over it to make it flat.

Measuring out receptacle boxes and windows take time.  You have to be very precise.  The last thing you want is to cut a hole in the wrong location!  In the end, I only screwed up one cut.  The good news is that it happened in the beginning so I was able to use the sheet for other smaller "scrap" pieces.

Once the ceiling is complete (24 sheets), we then moved on to the walls (47 sheets).  The walls are thinner (1/2" thick) and made of lighter material so they are much easier to work with.  The ceilings must be thicker in order to prevent the sheets from sagging under the relentless force of gravity over time.

Amy's dad, Bill, gave us a hand for a few days.  We quickly "got in synch" and were able to finish out the walls in just one and a half days of work!

The next step is to tape and mud the joints between the sheets.  While lifting the panels is very physically demanding, mudding is mentally trying.  First you put a thick layer of mud over the joints.  You then put wet drywall tape over the joint followed by another layer of joint compound.  The idea is to meld the junction of the two sheets into one continuously smooth wall surface.  Any irregularities in the mud must be sanded down and followed by another layer of compound until the surface is smooth.  This kind of tedium can drive folks crazy!  Me, I kind of like it.  You just zone out and make it look pretty.

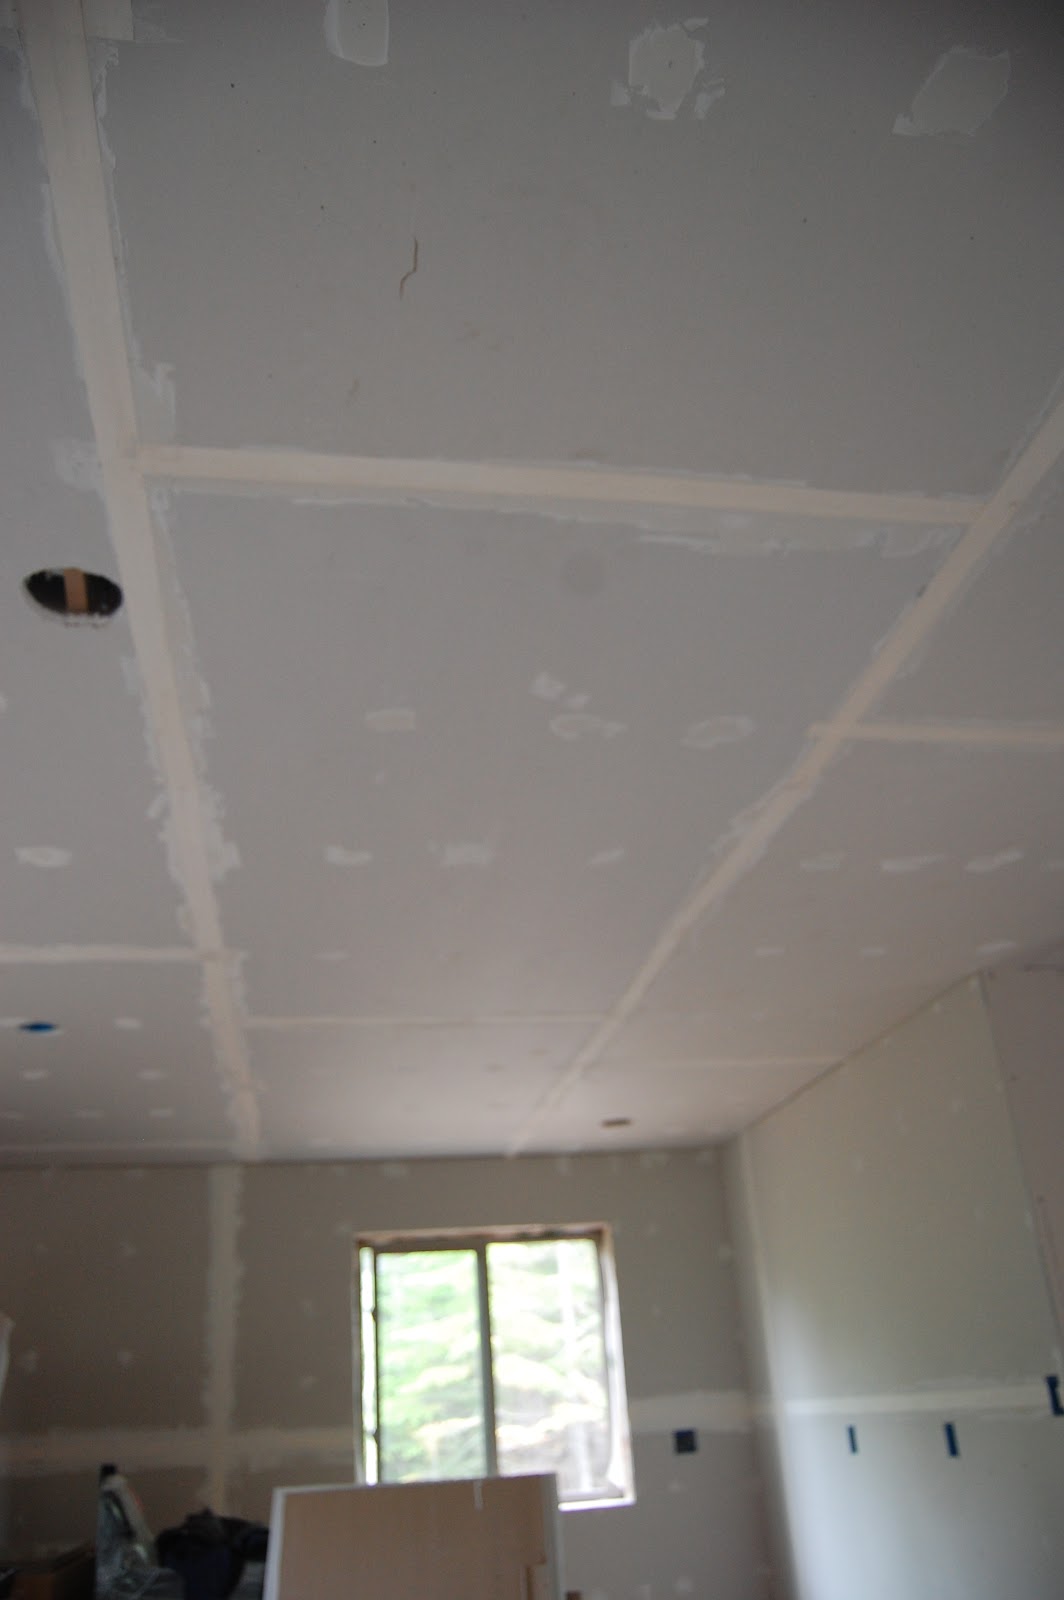
Fully taped and awaiting another layer of mud.

Our place, fully "rocked"!  It's amazing what a difference it makes...  

The other day while at the store we found ourselves with the rest of the crowd in the paint aisle.  While I kind of missed the relatively empty lumber yard, there was a great sense of satisfaction to be at this stage... 


Friday, May 20, 2011

Phenology

Warm.  Highs in the mid 60's with lows in the high 40's.  Spring flowers spotted today: Lady fern fiddleheads, large leaf aster leaves, miniature burgundy sarsaparilla, wood anemone blossoms and nodding trillium buds.  Marsh marigolds and wild strawberry flowers are abound.  Bugs are in the air.

Tuesday, May 17, 2011

Phenology

Clear skies and sunny.  highs in the low 60's and lows in the upper 40's.  The walleye season opened last week.  Caught two 10-12 inchers.  Spotted a black bear crossing the highway south of Duluth.  First leaves have sprouted from poplar trees.  Despite the grasses "greening up", the forests are drying up quickly.  Fire danger "high" on the Gunflint Trail.

Wednesday, May 11, 2011

Phenology

Highs in the upper 50's and lows in the mid 40's.  Low pressure has dominated weather patterns for the last week or so with frequent light spring rains.  Ice is out on the lakes of the Gunflint Trail.  Spotted two moose feeding on submerged vegetation in ponds.  The hare are now completely brown for the summer.

Monday, May 9, 2011

"Yard" Projects

While we are making great progress inside finishing out the cabin there still is plenty going on outside as well.  We try to do at least one chore outside at the end of the day when it is too dark to work inside without light.  


The south side of the cabin stares south down the driveway to Lake Superior.  We thought that this would be a great location for a fieldstone patio.  Here you can see the local rock landscaping and the sand that we have tampered down in preparation for the 2 inch thick fieldstone that we are collecting from the property to set and complete the surface.  


We have rock "issues".  This outcrop is preventing the water from our "castle moot" to flow down the ditch.  However, like any geologist I know exactly what to do about that!  Here I am with my drill hammer and rock chisel banging away along the fracture sets of the rhyolite trying to cut a channel for the water to escape.  It's not the most glamorous job in the world but actually kind of fun if your a "rock-licking geologist".


This picture pretty much sums up spring on the North Shore.  We're prepping soil to plant our seedlings next to the churning wood stove.  


Planting seeds in trays.  Once they have sprouted we'll put the plants in the cold frames to grow and harden off before being planted outside. 


Three trays all planted and ready to sprout.


We built cold frames out of old windows and lumber scraps.  Cold frames are a great way to extend our short growing season as they create a microclimate for not only sensitive seedlings but full grown lettuce and spinach.

Beyond these projects we have roofed our shed and cleared a spot for our winter firewood supply that will be delivered in 8 foot lengths in June.  One of the best things about developing a property from scratch is that it truly is a "blank slate".  There are so many things to do on a daily basis that you never get bored of doing the same thing (except maybe for cutting down balsam fir).


Friday, May 6, 2011

Phenology

After a few days of a gentle spring rain the sun is slowly showing itself.  Highs in the mid 50's and lows in the upper 30's.  First bugs out for the season.  Lettuce has sprouted in the cold frame.  First ticks on the dog.  The snowshoe hare has almost entirely lost it's white coat and is now about 75% brown.

Thursday, May 5, 2011

Wiring

It' official: we passed our rough-in electrical inspection!  Mainly due to my inexperience, wiring has been by far the most intimidating aspect of this project.  I knew absolutely nothing of the trade walking into this project.  And now, in lieu of passing my first inspection, I can say that I know the basics. 

The beauty of electricity is that it works simply.  Energy flows from a big wire to little wires to a outlet or receptacle that a switch controls.  The hard part is making sure that your circuit allows the energy to flow without any interruptions (and according to code).  

Planning out the design was by far the most difficult part of the job.  For one, you actually have to follow a code.  For another, the end result has to make sense.  There has to be some kind of logic to how you wire the place otherwise you end up with a spaghetti noodle looking mess where the switches don't turn the right lights.  But the real motivating factor to come up with a solid circuit design for a frugal Norwegian like me is money.  The last thing that I want is to double back copper wire over itself because I didn't think it through!  Needless to say that even with the help of friends, neighbors and a good "how to" book it took me over a month to completely design our circuits.

Although it took me a while to figure the design and amass materials, once I actually started wiring things went pretty fast.   The first step was to place the receptacle boxes.  Next I drilled holes in the studs for the wire to go through and pulled the wire.  Now that the wire is pulled through the wall or up and over the trusses from the service panel to the receptacle boxes the actual wiring begins.  


I really enjoyed wiring up the boxes and panel.  The work requires a great deal of precision but when you are wiring a new construction there is a great deal of leeway in the respect that you can make it up as you go.  With a little bit of common sense (knowing what each of the wires is doing) I wired up the boxes.  

My attention then turned to the panel.  In any home, electricity flows from the main service line into a panel.  Once in the panel the energy flows through a circuit breaker and then on through each of the individual circuits.  Circuits breakers are a good thing.  Each circuit has it's own breaker.  Breakers protect that circuit by cutting off the flow of energy if it detects any change in the electrical flow (overload or short).  Code specifies what kind of breakers are used based on the amperage of the circuit and what the circuit is energizing.
 

Once the panel and boxes were wired I made sure that everything looked nice and organized for the inspection.  When spring road restrictions are lifted our utility company with pull the main power in from the base of the driveway.  We will then connect that power source to the panel, get the final inspection and energize the system.

The learning curve was certainly steep.  However with the help of friends (Special thanks to Dan, Joe and Isaac!), a good book, and some common sense the castle is now wired.  

I'm now back on familiar grounds: carpentry! 

Time to insulate and drywall...